A big hello to all Stamp Crazy members! I'd like to offer you a personal invitation to my brand new blog - Slania Crazy! Come and take a look and become a member if you like!
http://slaniacrazy.blogspot.com.au/

Thursday, 16 April 2015

Sunday, 22 March 2015
Forest Scenes by Toth
Rudolph Toth was an incredibly gifted Austrian stamp engraver. He often worked in collaboration with the designer, A. Pilch.
In 1962 Toth engraved a set of stamps for Austria showcasing some of the country's stunning forests. In my view, Toth has done an amazing job capturing the majesty of the Austrian forest.
In the first stamp, Toth depicts a Lowland Forest using various shades of grey to good affect...

The second stamp depicts a typical deciduous forest. Click HERE for more on deciduous forests.
.jpg)
In the final stamp of the series, Toth illustrates a fir and Larch forest.
.jpg)
Here is an example of the European Larch Larix decidua ...

Stay Stamp Crazy!
In 1962 Toth engraved a set of stamps for Austria showcasing some of the country's stunning forests. In my view, Toth has done an amazing job capturing the majesty of the Austrian forest.
In the first stamp, Toth depicts a Lowland Forest using various shades of grey to good affect...
The second stamp depicts a typical deciduous forest. Click HERE for more on deciduous forests.
In the final stamp of the series, Toth illustrates a fir and Larch forest.
Here is an example of the European Larch Larix decidua ...
Stay Stamp Crazy!
Wednesday, 11 March 2015
Czeslaw Slania in Aland
Aland or Aland Islands is an autonomous region of Finland. It ... "consists of an archipelago lying at the entrance to the Gulf of Bothnia in the Baltic Sea." (Wikipedia extract) For more info on Aland, click HERE
***
In 1994 Czeslaw Slania engraved a set of three stamps for Aland, exploring Aland in the Stone Age. It is the simplicity of their design which I find the most striking. Let's take a look and you can judge for yourself.
The first stamp in the set depicts Stone Age pottery from the region.

***
The second stamp in the set depicts an example of the type of housing found in the region during this period.

***
The final stamp in the set gives an an insight into some of the stone tools utilised by the inhabitants of the region at the time.

Monday, 23 February 2015
Czeslaw Slania - The First of Many!
The name Czeslaw Slania has become synonymous with engraving brilliance. But where did the master begin? What was the first stamp he engraved? For a biography of Slania click HERE.
The first stamp Slania engraved was as an apprentice under the watchful eye of M.R. Polak in 1950 for Poland. Slania had not yet earned the right to engrave the entire stamp. He was permitted to engrave the metal part of the hammer being wielded by a Polish worker.
Poland 1950 Sc. #486

A proof of the stamp is also available in a special booklet in a different colour. I personally prefer the colour chosen for the proof.

Okay, so what about the first stamp engraved entirely by Czeslaw Slania? It wasn't long in arriving - the next year in fact! 1951. The stamp was again for Poland, and it was issued to commemorate the 80th Anniversary of the Paris Commune. If the skill of Slania had not been evident in the first stamp he worked on, this stamp leaves no room for question. It is simply beautiful.

There is an interesting story that goes along with this stamp. The portrait on the stamp is supposed to depict General Jaroslaw Dabrowski, but instead by some mistake somewhere along the line the portrait actually depicts the composer and pianist Henryk Dabrowski. I have been unable to locate another image of the composer Dabrowski for comparison, but I have found images of Gen. Jaroslaw Dabrowski. One such image is on a Polish banknote.

If indeed the portrait on the stamp is the composer Henryk Dabrowski, then the likeness he bears to Gen. Jaroslaw Dabrowski is rather striking. One could be forgiven for mixing the two up. Do these two gentlemen bear a striking resemblance? Are they perhaps brothers? Or is the portrait on the banknote wrong also? Or is the portrait of the correct man after all? If anyone has any information relating to this stamp, I'd love to hear from you.
Sunday, 26 January 2014
Enter the World of Engravers!
Czeslaw Slania
It feels like an age since I did my last blog post! In that space I have been keeping busy checking out, what is for me, a different type of stamp collection - engravers. To be honest, till recently I'd never really given much thought to who engraved what stamp. Then, just before Christmas, a stamp friend sent me some stamps engraved by Rudolph Toth, an Austrian engraver. The instant I saw the amazing details, I was hooked!! That very night I jumped on the net and started surfing, searching for engravers. I found to my delight and dismay there are plethora talented engravers out there. Besides Toth, two engravers stood out to me. One was Albert Decaris, an incredibly talented French engraver. The other engraver needs no introduction to those in the stamping world - Czeslaw Slania.
In the coming weeks I'll take a look at some of the works of Toth and Decaris, but today is all about Slania.
I did some basic research into Slania and found this great website: I quickly discovered that Slania's first stamp engraving as an apprentice was a part engraving on a stamp from Poland issued in 1950. Turns out Slania engraved the metal head of the axe on the left hand side of the stamp. Seeing this cool bit of info, I immediately knew how to start my collection - right at the beginning. So I have. I just purchased the stamp plus a proof that, I believe, came in a special booklet.

I'm rather chuffed, and I can't wait till they arrive. When they do, I'll post higher resolution scans.
Stay Stamp Crazy!!
Saturday, 21 September 2013
Lavender Hill Mob Forgery
The Fake 24p Rust Machin
The Lavender Hill Mob were a gang of forgers who printed over £50 million of fake currency during the 1980’s and early 90’s. They managed to inject over £30 million of fake cash into the economy, some of which is still circulating to this day. Although specialising in fake currency , the gang also printed Postage, Gas, and TV Licence stamps.
The focus of this brief study is the forged 24p Machin Head Definitive Postage Stamp ...
 |
| Forgery |
 |
| Genuine Stamp |
The gang chose to forge the 24p Rust Machin Head stamp, as 24p was the current inland letter rate at the time. They printed the stamp in offset Lithography. They used a Genuine half-sheet of 100 as their template. The forged postage stamps began to appear in the summer of 1993 in mail posted from London and Essex.
Above is an example of the forged stamp alongside a Genuine stamp for comparison. Clearly the colour is an excellent match to that of the Genuine Stamp, enabling the untrained eye to be fooled.
To the trained eye, however, the forgery clearly stands out as a fake. For one, the perforations are much larger at 11 as opposed to 14 or 15. The perforations are also Line Perf. And not Comb. Perf.
 |
| Large Forgery Perfs 11 |
+-+Copy.jpg) |
| Genuine Perfs 14 or 15 |
A close look at the gum also reveals a striking difference. The Deegam Catalogue further elaborates: “The gum ... is very thin and shiny, with no green or blue dye. It does not appear to be gum arabic since there is no 'crazy paving' appearance under magnification … ” Deegam further suggests, “It maybe a variant of Polyvinyl acetate (PVAc).”
Stay Stamp Crazy
Monday, 2 September 2013
Printing Confusion!
Who Can You Trust?
Recently I purchased a lovely Butterfly Custom Booklet direct from Royal Mail. After it arrived, I scanned it and proudly presented it on this Blog. For the technical details I referred to the Royal Mail website. I assumed the information on the site to be accurate. My assumption was wrong. Not long after publishing the article on my blog, it was pointed out to me that the method of printing described for the booklet was incorrect. I had written that the printing method was Litho (Lithography) when it fact, the booklet was clearly printed in Photo (Photograuvre).
To refresh the memory, this is the booklet in question...

I have found that the best way to tell the difference between Photo and Litho printing is to take a close up look at the value and the border of a stamp. When a stamp is printed in Photo tiny square cells can be seen along the edges of the coloured portions of the stamp. This is a product of screening, which is part of the Photo process.
Let us take a close look at one of the 1st Class Royal Mail Red stamps in this booklet.

As you can see this stamp clearly has the hallmarks of a Photograuvre printed stamp. The arrows point to the areas in which the screening effect can be seen.
Conversely, this is what a stamp printed in Lithography will look like...

I guess the moral of this story is to always question and to seek out your own answers! My lesson has been learnt.
Stay Stamp Crazy!!
Tuesday, 20 August 2013
Butterflies
Royal Mail's New Retail Booklet

Stay Stamp Crazy!
Saturday, 17 August 2013
Machin Diary 5
Bags of Fun!!
Recently I purchased a bag consisting of 1 Kilo of Machin stamps on paper. I haven't had much of a chance to delve into the mysterious depths of said bag just yet, but today I will be tackling it full force!!


These shots were taken on the day of arrival. Naturally I was exceedingly excited. Don't those bags, choke full of stamps, look simply marvelous? I believe is it time now to remove myself from the computer and start digging!!
I assure you, as readers of this blog, you will be the first to discover the bounty locked within these plastic bags!
Stay Stamp Crazy!
Thursday, 15 August 2013
Machin Diary 4
Covered in Machins!!
Hi all. I just realised I haven't made a blog post in quite a while. I've been busy, busy, busy with my new Machin collection.
Since the last dairy entry I wrote, I've been happily stockpiling lots and lots of new and used Machins. I have come to the decision that, not only do I want to build a collection to fit into the album pages I recently purchased (no mean feat!), but I also want to build a specialist collection of 1p Machins. Why, you may ask? Well, put simply, I have always been fascinated with 1p or 1d stamps. Especially red ones. I have a large collection of Australian KGV 1d reds that I've been working on for several years now that, at present, doesn't have an end in sight.
Anyway, back to Machins. In future diary entries I'll keep you updated on my progress with my 1p collection. But for now I thought it might be fun to share some of the covers I have recently received that are adorned with beautiful Machins. After all, postage is what these tiny masterpieces are for!!
This first cover has a 2012 Diamond Jubilee 1st Class self-adhesive stamp as well as an 8p rosine. Incidentally, the Diamond Jubilee stamp has no source code in the iridescent overprint, which means it is from a counter sheet.

This next cover has a 1p Dark Crimson (first printed 8 March 2011) with security U-slits. It also has a 5p Red Brown (8 March 2011) with security U-slts. Two lovely 9p orange stamps and a 63p Wales definitive are added to the mix.
.jpg)
When I saw this next cover in my mailbox, I instantly fell in love. It is delightful. Not only does it have a Doctor Who Mini Sheet affixed, it also has three spanking new Machins. First we have the 20p Light Green. This stamp was first issued on 8 March 2011. It was reprinted and released again on 3 January 2013 with an M12L date code. It has no source code so it is from a counter sheet.
The 50p Slate Grey was issued on the 3 January 2013 also. It too has a M12L date code and no source code. It is a real stunner, is this cover!!
.jpg)
Last but by no means least, we have a great make-up set of Machins totaling £1.88, the current overseas airmail rate for under 20g.

That's it for now. As always...
Stay Stamp Crazy!!
Thursday, 27 June 2013
Dr Who Turns Fifty
50th Anniversary Stamps
It seems like it was only yesterday that I sat down as a kid, turned on the tele, and watched Dr Who battling some form of terrible evil. Well folks, it's now been fifty years since this iconic BBC series first aired on 23 November 1963. The recent release of a set of Dr Who stamps by Royal Mail has brought back a lot of great memories for me. I wasn't yet on this earth when Dr Who first started. I rather wish I was. The early Black and White stories, to me, are the best! So let's take a journey back to where it all began. Join me in my time machine as I go back to 1963...
It is now 1963 and the world is a very different place. No ipods, no mobile phones (cell phones), no laptop computers. This was a time when families huddled around their Televisions to watch shows transmitted Black and White. I wonder what someone from 1963 - if transported ahead in time to 2013 - would think of our huge flatscreen HD TV's?
Now that we are in 1963 why don't we find a house that has its TV on and take a peek at what they are watching? It is now 5:15pm and I have it on good authority that a brand new Science Fiction show is about to start...
Just to the left. A house with the TV on. Let's hurry. Oh good. It's just starting. The strange swirly white mist accompanied by riveting music has the family in this particular house transfixed. The story that evolves on the TV on 23 November 1963 is now very well known. The show was Dr Who. The episode was entitled An Unearthly Child.
In this very first episode of Dr Who we meet two school teachers, Ian Chesterton and Barbara Wright. They are both intrigued by a gifted student named Susan. The pair decide to follow Susan home. To their horror they discover that Susan lives in a junkyard at 76 Totters Lane. They follow Susan into the junkyard. There thy are accosted by a strange old man who, Susan claims, is her Grandfather. He has appeared from inside an old blue Police Box. The school teachers then find themselves inside this Police Box. They are amazed!! The inside is huge. It's a spaceship. Then the old man turns on the spaceship...
The rest is history!!
That crazy old man in the junkyard turned out to be the 1st Doctor played by William Hartnell (who happens to be my favourite). Hartnell played the Doctor for 4 seasons until his final story The Tenth Planet, the final episode of which aired on 29 June 1966. Quite a few episodes from the 1st Doctor are, sadly, today missing, including most of the scene in which Hartnell regenerates to the 2nd Doctor...
+-+Copy.jpg) |
| William Hartnell |
The 2nd Doctor first appeared at the end of The Tenth Planet. He was played by Patrick Troughton. The 2nd Doctor's first story was called The Power of the Daleks. It first aired on 5 November 1966 at 17:50pm. Sadly, most of the stories of the 2nd Doctor were destroyed to make space (if only they knew how popular the show was to become!). Sigh!!
+-+Copy.jpg) |
| Patrick Troughton |
To find out more about the stories of the first 8 Doctors, check out this great site: Click here!
Stay Stamp Crazy!
Monday, 27 May 2013
Machin Diary 3
Surmounting the Mount!
I'm back again for another installment of my Machin diary. Number 3. Check out diary entries 1 and 2 for the story so far...
Okay, now that I have my Great Britain Machin album picked out - see this website HERE - my pages printed, and my mounting system all worked out, it's time to start sticking the little fellas in!
As I mentioned in my previous diary entry, I had already purchased a few boxes of Hawid stamp mounts, but I had never pulled them from their packaging and looked at them. I tell you now it came as a shock to me what they looked like. I have never used a mount in my life. Hagners - yes. Hinges - yes. But mounts - no! So I freely admit that I had absolutely no idea how I went about affixing them to the album pages! Luckily I am a member of a very good stamp forum known as The Grumpy Old Men's Club. I went straight to the forum and posed my embarrassing question. A member answered me almost straight away.
The answer to my conundrum was very simple. Lick - or wet - the backside of the mount. Okay then, problem solved. Armed with this information, I grabbed a stamp mount, licked the back, then with shaking hands placed it on the album page. There. Easy. I leaned back to admire my work... Horror! The mount was crooked!! Undeterred, I had another go. A little better, but still not great. Bugger! My disappointment rising, I headed back to the GOMC forum to vent my troubles. Within moments I got a tip that I am forever grateful for. Thank you Roos!!
Use a ruler.
So I did. And lo and behold my mounts started going on nice and straight. I did discover one trick for myself while happily sticking on my mounts. Using a ruler with a thick edge - mine is of the wooden variety - works the best. I have now applied this method to several album pages and I'm quite happy with the results. Here's one of the pages:

Incidentally, those first two crooked mounts, I managed to, very carefully, remove from the page and apply them straight!! Here's a close-up of one of the mounts...

Next time round I'll take a look at the criteria used by the author of the album I am using to sort Machins into a workable collection.
Until then...
Stay Stamp Crazy!
Sunday, 26 May 2013
Machin Diary 2
Mounting Troubles!
Welcome to my second Machin Diary post. Those of you who read my first diary post will know that this whole blog series revolves around my journey collecting Great Britain Machin Head stamps. Much of the information in my initial posts comes from a fantastic website, in which I found a great set of album pages to download. Click HERE
In this post I'll be looking at the different choices I had for mounting my collection on the printed pages. But first I thought it might be fun to have a bit of a history lesson.
Why are Great Britain definitives called 'Machin Heads?'
Machin (pronounced may-chin) Heads are named after Arnold Machin (1911-1999), a British artist, sculptor, and coin and stamp designer.

Machin's road to fame began in 1964 when he was selected to design an effigy of the Queen's head for a new series of British decimal coins scheduled to be released in 1968. Incidentally, this same effigy was also used on Australian, Canadian, and New Zealand coins until the 1980's. In 1966 a similar design of the Queen's effigy by Machin was approved by the Queen to be used on stamps. On 5 June 1967 the first Machin definitive was issued - the 4d denomination. And so began what is arguably the longest running definitive stamp series.

Now let us turn to the question of mounts. What is the best system? Hinges? Hingeless mounts? These choices come down to personal preference. My preference is not to use hinges on mint stamps. Since my collection - at this point - will be mint stamps, hinges are out. That leaves hingeless mounts.
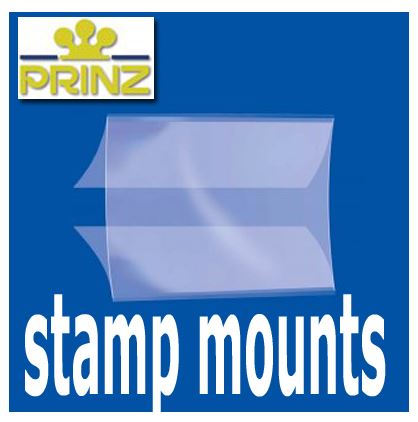
Decision made, I thought. Wrong! Now I had to choose what type of hingeless mounts I wanted to use. The standard Hawid mount with a clear flap behind which the stamp is inserted. Or the other type of mount known as the GARD mount.
 |
| Hawid Mounts |
 |
| GARD Mounts |
A couple of years ago I had already bought a few boxes of Hawid hinges so my choice was, in effect, already made. Hawid mounts come with a clear backing or a black backing. At first I thought the black backing would look cool. But then I got to thinking: what if I placed the darn thing on the page slightly crooked? A black square on a white background would stand out like the proverbial. Thankfully I had purchased clear mounts. Phew!
Next time - Sticking the mounts in! Plus a few more goodies.
Until then...
Stay Stamp Crazy!!
Saturday, 25 May 2013
Machin Diary
The Beginning
For several years now I have been planning to start a Great Britain Machin Head collection. Due to many different circumstances I have put it off and put it off. That is until the other day when I found a great website that sells Machin Head Album pages already laid out for the collector. Click HERE to have a look for yourself. It's well worth it. After looking at the site I decided to go for it.
So, having decided to take the plunge, I thought, wouldn't it be great to document my Machin journey for posterity? A collection such as this will be full of excitement, pitfalls, and perils. But what an amazing journey. If you are new to Machins yourself, perhaps you can learn along with me. If you're an old hand at these heads, then maybe you'll get at least a little entertainment over my fumblings. There are sure to be a few of those!!
To begin our journey, let's return to the Machin Album website. Upon close inspection I discovered that there were a few choices that must be made immediately. Oh dear!! I've only just started. But I took the bull by the horns - as it were - and probed deeper.
Firstly, I was then prompted to choose which type of collection I was to embark upon. Basic (free). Novice. Intermediate Advanced. Each of the categories delve a little deeper into this amazing branch of philately. I carefully studied each category to see what it had to offer. (In my next diary entry I'll look more in depth at each of these categories). I also tried to take into account my budget. I didn't want an album that I knew I'd never be able to fill because of high-end material that was out of my reach. Herein lay my first problem! I know little about these stamps so how do I know if I am getting an album that I can fill? A quick consultation with my Stanley Gibbons gave me some answers.
Now I felt I was armed with enough knowledge to choose. Being a novice, but wanting a bit more of a challenge than the Novice collection allows for, I chose intermediate. Then it was simply a matter of parting with some hard earned cash, and pressing a button. Then presto, I was now the proud owner of over 300 Machin Head album pages.
Here is a sample of one page from the album:

Now that I had my album sitting on my hard drive ready to go, I came to my next big question. So many questions so soon!! Aarrgh!! What weight paper should I use to print out my album? Research suggested no less than 160 gsm paper. I live in the country, so I don't exactly have a wide selection of stationery to choose from. I found a ream (500 pages) of decently priced 100 gsm paper. I reasoned that it would do the trick for me as I intend to place the pages in protective plastic sleeves. Now it was simply a matter of loading up the printer. And waiting...
Within minutes I had an album sitting before me. Well, not quite. Studying the album pages I found that it was yet again decision time. Hinges!! But I'll leave that dilemma till next time...
Until then...
Stay Stamp Crazy!!
Tuesday, 14 May 2013
QEII Definitives - Southern Rhodesia 1953 (Part 2)
Southern Rhodesia 1953 Part 2
On 31 August 1953 Southern Rhodesia issued its first Queen Elizabeth II definitives. This lovely set consisted of 14 stamps, on unwatermarked paper. This series was recess-printed by Bradbury Wilkinson & Co (except the 4d stamp, which had a typography vignette).
In Part 2 we shall study the 2d and 3d stamps of this set. The 2d stamp is perforated 14. The 3d stamp is perforated 14 x 13½. Both stamps were issued on 31 August 1953.
The first stamp we will study is the 2d deep chestnut & reddish violet. The focus of this stamp is Rhodes' Grave. Cecil John Rhodes (5 July 1853 - 26 March 1902) was born in England. He was a mining magnate who spent most of his time in South Africa. He founded the company De Beers, which today markets 40% of the world's rough diamonds. Rhodes, A believer in British colonialism, was the founder of the southern Africa territory that became known as Rhodesia, in his honour, in 1895. Cecil Rhodes died in 1902, aged 48. After his death, the government arranged for his body to be taken by train to Rhodesia where he was laid to rest at World's View, a hilltop just south of Bulawayo. His grave site is now a part of the Matobo National Park in Zimbabwe which was at the time of his death, Rhodesia.
.jpg) |
| SG 80 |
Now we shall turn our attention to the 3d chocolate & rose-red stamp. The focus of this stamp is a farm worker. Tobacco and cotton were the dominant farming industries in Southern Rhodesia. It was these industries that led to a boom in immigration to the colony in the 1920's. Unfortunately many farm workers were considered no better than slaves at this time. The political turbulent political history of this colony is beyond the scope of this humble article... This ARTICLE may be of some interest to those looking for some further reading. And you may also wish to check out this PAGE
.jpg) |
| SG 81 |
Stay tuned for Part 3 of this series. Until then . . .
Stay Stamp Crazy!!
Wednesday, 10 April 2013
A Commemorative Winner
60th Anniversary of the Queen's Coronation
The 9th April may seem like a rather strange date for the release of Australia's QEII Coronation Diamond Jubilee Commemoratives. The Coronation took place on 2 June! Nevertheless, the stamps - in my humble opinion - are a real winner! Australia Post came up to the plate and hit a home run!!
The issue comprises a set of two stamps. A 60c stamp for postage within Australia, and a $2.60 stamp for International Postage.
The 60c stamp is in landscape format. It depicts the stunning and ornate royal golden carriage...

The $2.40 International stamp is a close-up of the Queen from a portrait with her husband the Duke of Edinburgh, Prince Phillip...

The mini-sheet, incorporating both stamps, includes the full protrait of the Queen and the Prince...

As usual, Australia Post has released quite a few souvenir items Here are a few...
 |
| 5 x $2.40 peel & stick booklet |
 |
| 60c Maxicard |
 |
| $2.40 Maxicard |
Stay Stamp Crazy!!
Saturday, 6 April 2013
QEII Definitives - Southern Rhodesia 1953 (Part 1)
Southern Rhodesia 1953 Part 1
Southern Rhodesia was a self-governing British colony now known as Zimbabwe. Over the years it has undergone numerous name changes. For more information click HERE
On 31 August 1953 Southern Rhodesia issued its first Queen Elizabeth II definitives. And what a beautiful set it was!! This set consisted of 14 stamps, on unwatermarked paper. This series was recess-printed by Bradbury Wilkinson & Co (except the 4d stamp, which had a typography vignette).
In Part 1 we shall study the first two stamps in this delightful set. Both stamps are perforated 14 x 13½. Both stamps were issued on 31 August 1953.
The first stamp in the series is the ½d grey-green and claret. The focus of this stamp is the sable antelope. The sable antelope (Hippotragus niger) lives in the wooded savannah areas of East Africa, and in the southern parts of Africa. The sable antelope is a large species. They can grow as tall as 1.4m. They have impressive antlers that can grow as high as 1.1m. Sadly, their lovely antlers have become prized trophies for hunters. This combined with the sable antelope's habitat being slowly eaten by farming has reduced their numbers considerably.
 |
| SG 78 |
The second stamp in the series is the 1d green and brown. The focus of this stamp is the industry of tobacco growing. According to an article in Economic Geographic (July 1952 vol. 28, no. 3) the tobacco industry in Southern Rhodesia boomed after WWII. By 1950, a few years before this series was issued, tobacco had surpassed gold as the premier export of Southern Rhodesia. It is, therefore, quite appropriate that the tobacco industry be depicted on a stamp of the region...
.jpg) |
| SG 79 |
In Part 2 we shall discover where the name 'Rhodesia' originated. And more! Until then...
Stay Stamp Crazy!
Monday, 1 April 2013
QEII Coronation Issue Part 3
Beauties and the Beast
The Coronation of Queen Elizabeth II took place on 2 June 1953. To
commemorate this momentous event 106 stamps were issued throughout the
Commonwealth. 62 of these stamps were in the Omnibus format. In Part 1 we
studied the story behind the Omnibus Issue. In Part 2 we studied the lovely
Coronation stamps of Great Britain.
In this the final part of the Coronation series I'd like to study
two vastly different issues: one that, to me, offers beauty in its simplicity;
and one that has, over time, been heralded as downright ugly.
Australia was one of eleven territories to opt for its own design.
This proved to be an excellent choice, for the resultant issue was nothing
short of stunning! The design was the brainchild of one F.D. Manley. Frank
Davies Manley, born in Lambeth, London, England on 24 October 1894, was a
gifted artist who went on to be one of, if not the most, prolific stamp
designers in Australia. He designed some of Australia’s most iconic stamps.
Australia issued three stamps for the Coronation. All were of the
same design, but with different colours and denominations. All three stamps
were perforated 15 x 14.
The first stamp is the 3½d Scarlet...

The second stamp is the 7½d violet. My
favourite of the three colours....
.jpg)
The third stamp is the 2/- dull bluish green...

Now to the beast, as it were. This stamp probably needs no
introduction! The ugly duckling award goes to... Canada.

Canada's 4 cent violet Coronation stamp was
based on a stunning portrait of the Queen taken by Yousuf Karsh.

So what went wrong?? Well, let me tell you a
little story. The design of Canada's Coronation stamp was placed in to the
hands of Emanuel Hahn, who was a freelance artist. Hahn based his design of the
Queen's head on a plaster cast that was made, based on the Karsh protrait. The
deviation from the Queen's likeness had begun.
When the design was complete it was given to
engraver, Silas Allen. Allen asked the Post Office for a copy of the original
portrait as he didn't like the look of the portrait within the stamp design. He
was refused access. Dubious, Allen set to work. He created a Die proof that to
him was awful, and he hoped the Post Office would agree. But they didn't!! They
accepted the Die proofs!! Allen must have been stunned. Apparently Silas
Allen never got over the negative publicity of the design.
So, the ugliness of this stamp has nothing to
do with its designer OR engraver. The blame must fall squarely on the shoulders
of those who approved the Die proofs!!
Stay Stamp Crazy!!
Subscribe to:
Posts (Atom)